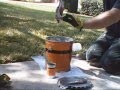
Sonneborn SL2 Installation - BASF SL2 mixing and installing into the joint for flat areas (no slope). Use of a refillable caulk gun or plastic bottles can be used to get the material in the joint cleanly then sand can be sprinkled lightly on top to prevent tires from sticking to the material before it hardens and also adds color and texture.
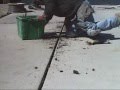
Demo and Joint Preparation - Removing existing joint material without damaging the joint then grinding the side walls to remove any dirt and expose a clean surface area.
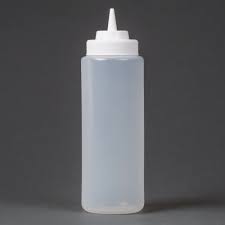
Cleaning & Recycling 32 oz. squeeze bottles - If you decide to use the plastic bottles to apply the SL2 into the joints, you can actually re-use them over and over again. It takes just a few minutes to clean them out and for me, is easier and cheaper than using Zylene to wash them out. Some of my helpers simply use the bottles once, then toss them and think I'm being too anal but I save hundreds of dollars a month by recycling my bottles. Plus, I don't have to buy them as often.
Back-filling Joints & Black Holes - After grinding the joints sidewalls and installing dams at any open ends to keep the SL2 from flowing out the ends, you're ready to back-fill the joints with foam backer rod or sand.
Sonneborn SL2 Installation - 2" x 4" Joints - Larger joints are totally different jobs to do than the 1" x 4" joints. Do not even attempt until you have mastered the smaller joints and jobs. 2" x 4" joints are harder to remove from the slab, don't break apart as easy and take four times the material to remove, back-fill and re-fill.
Removing the old wood or worn out mastic from expansion joints in conrete is a relatively simple process for anyone who has basic handyman skills and some basic tools. The YouTube videos below will give you a basic understanding of the process. However the most important thing to know about doing the work is to take your time, don't be in a rush; the driveway is a part of an individual homeowners property. When you rush a job, its easier to chip the concrete or worse. Don't even start the job if you can't extract the old materials and do the prep work if there is any chance of chipping out any areas.
Sonneborn SL2 Installation for Sloped Driveways - Doing a sloped driveway is more difficult than doing a flat surface installation. Because the material "Self Levels", (SL), using SL2 alone will not work. The material will run out the end of the joint and cause major cleanup problems (and more). We mix 50% SL2 and 50% SL2 Slope to install at up to 45% angle with minimal material displacement.
Video Library of Installation Techniques
Call us today at 512-547-4635 to join our team today!